Building Secure Alexa Skills - Part II
Dec 27th, 2023 update: Webtasks have been deprecated.
These two posts are largely based on a proof of concept project developed by my friend Pushp Abrol for a customer. Thanks Pushp for your guidance!
In the previous post I wrote about the basics of a custom Alexa skill, using Webtask to implement the core of it. This 2nd. part focuses on the security aspects.
Setting up the API in Auth0
The first step in securing the API is to create a definition for it in Auth0.
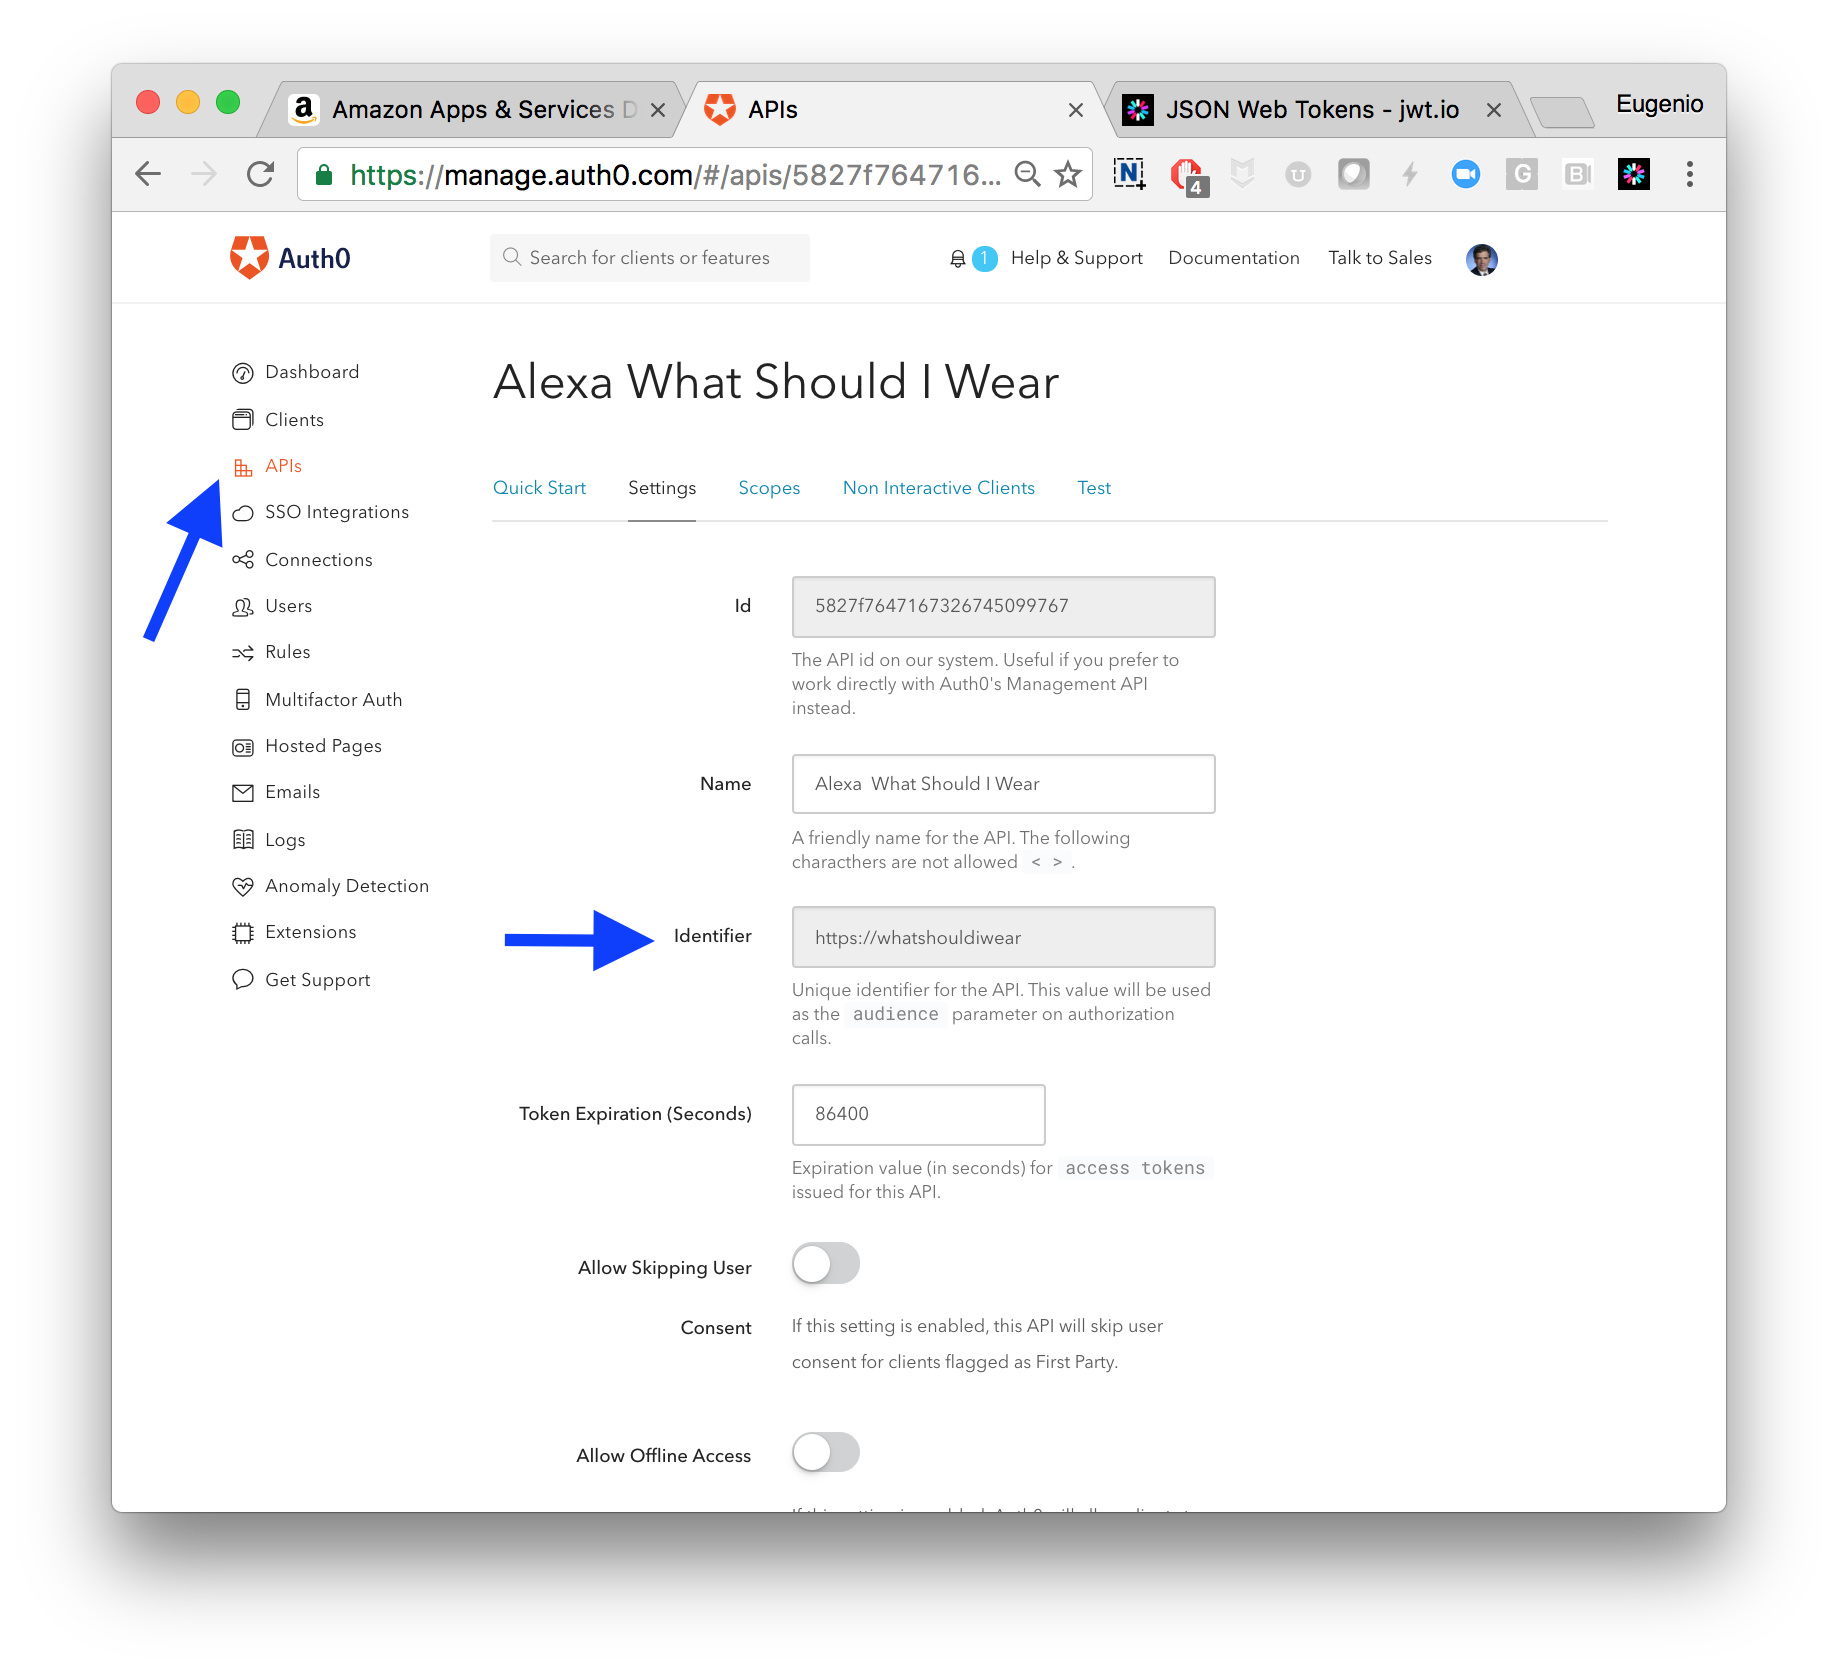
The main elements on this definition are:
- The identifier for the API (this will translate into the
audienceclaim in the token that Auth0 will issue) - The signature algorithm (I’m using RS256, a public/private key algorithm that doesn’t require sharing secrets)
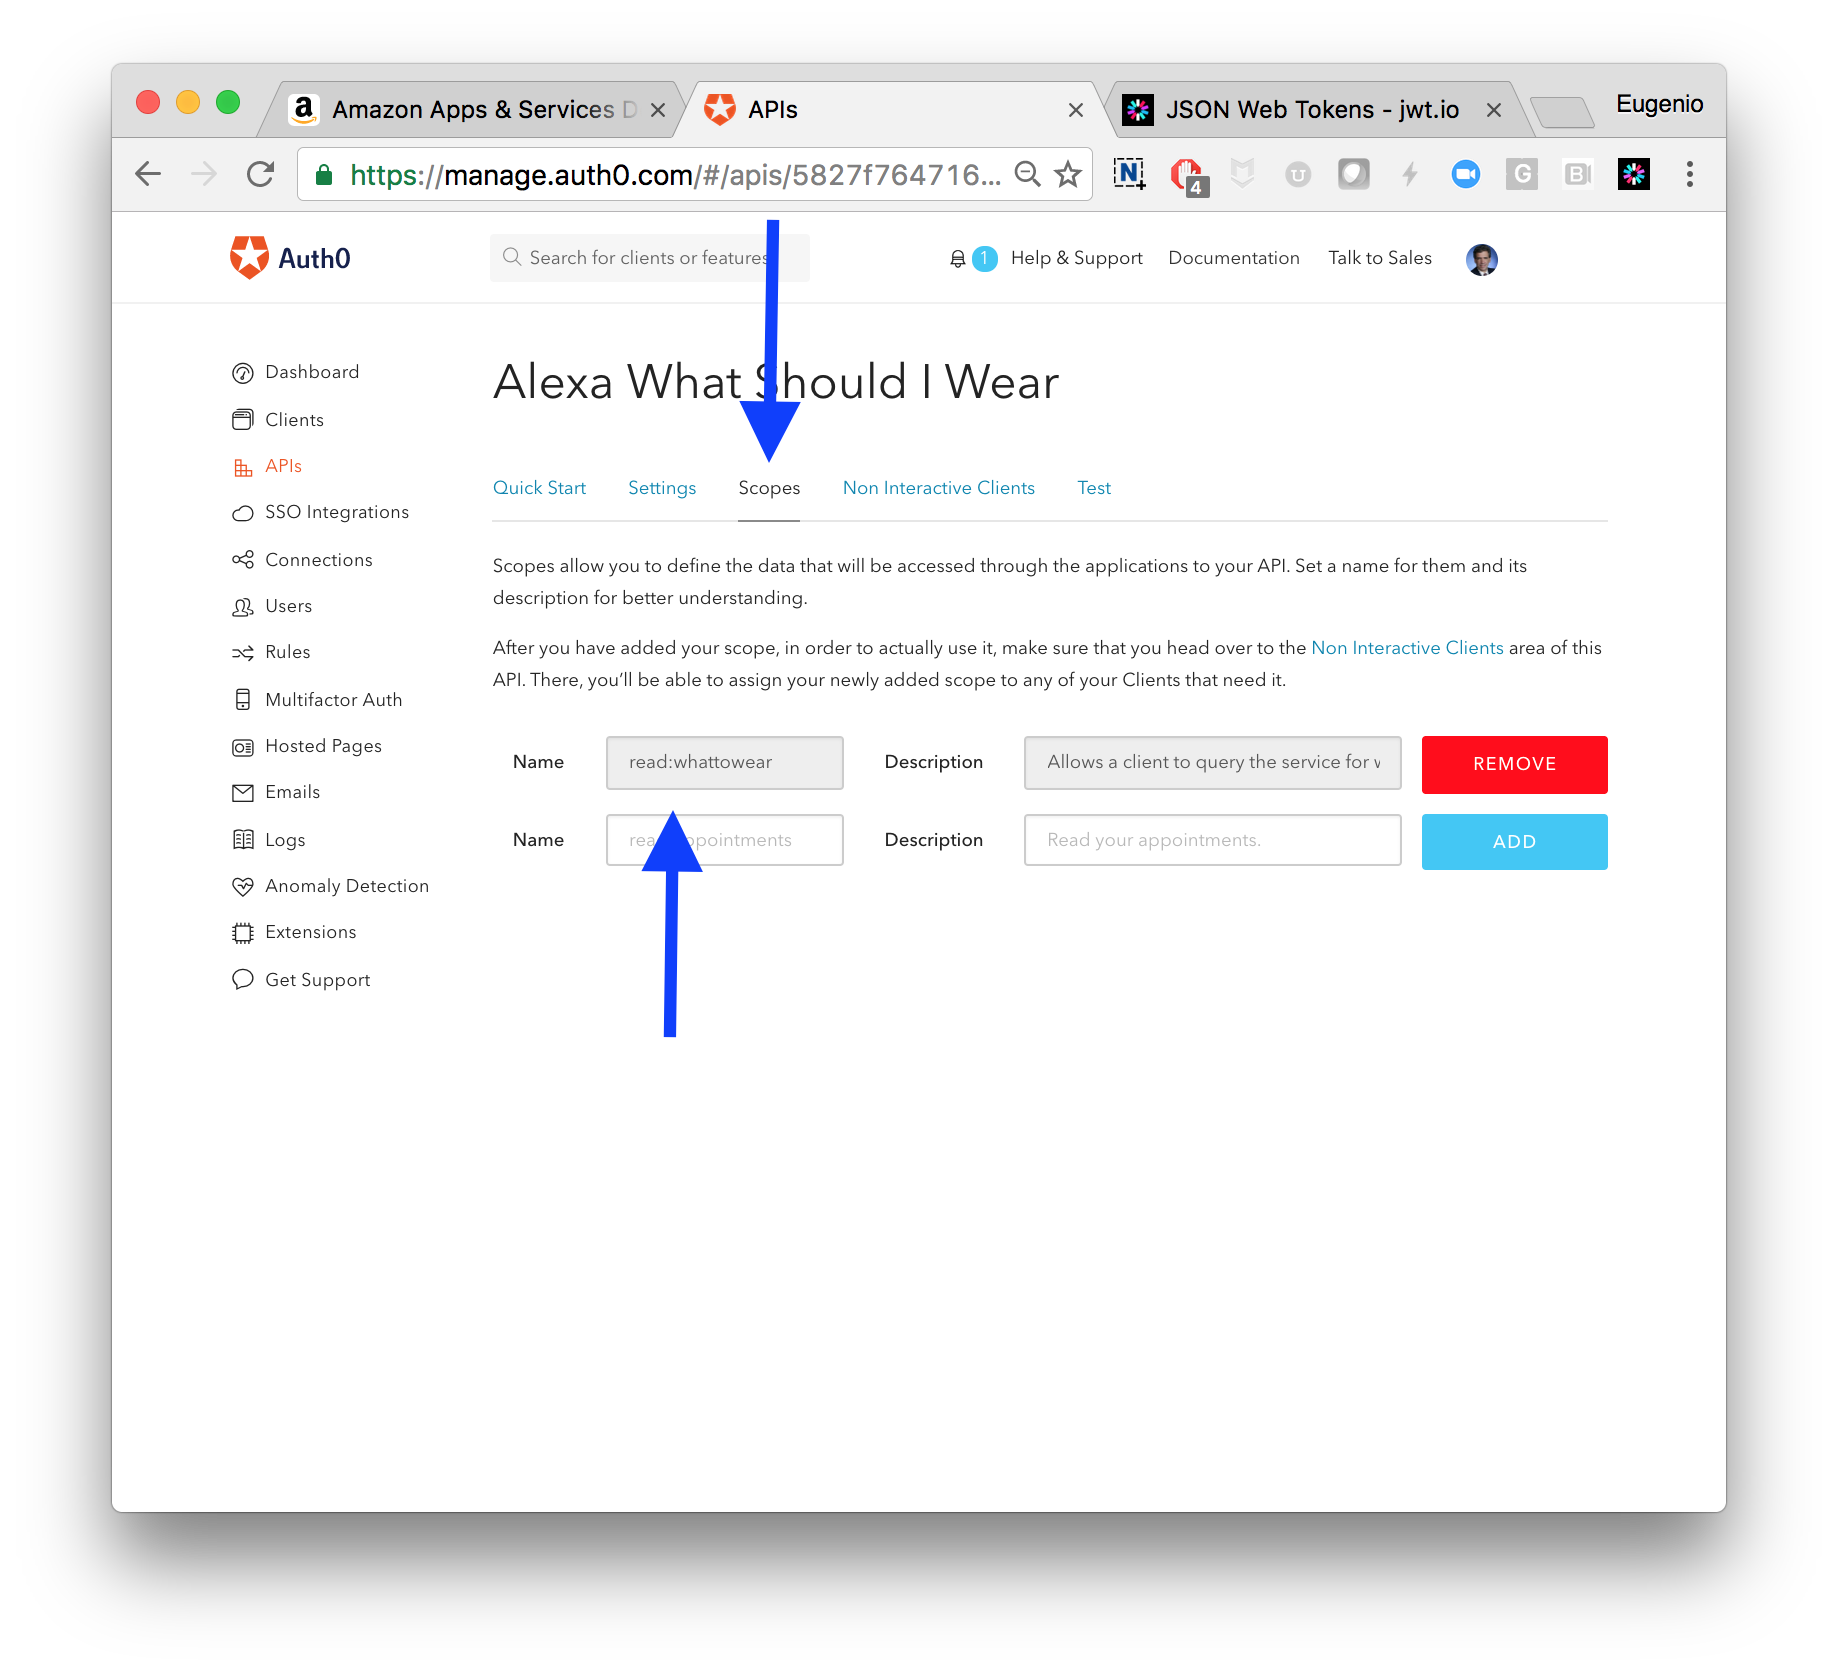
- An optional
scope
This is a very simple API, so it might not make sense to define a very complex security model for it, but I created a scope anyway for illustration purposes.
My API definition looks then:
- Audience:
https://whatshouldiwear - Signature:
RS256 - Scopes:
read:whattowear
Setting up the client in Auth0
In this architecture the client of the API is Alexa. We need a definition for this too so I created a new Client on the Auth0 dashboard:

You can then optionally choose which method of authentication you want to enable for this client. In Auth0, this is configured under Connections.
If you are following this, keep this window open as you will need to copy & paste settings from and to this page.
Configuring Alexa to Authenticate with Auth0
Alexa’s designers choose to support OpenID Connect as the protocol to delegate authentication for external APIs. This is great because it means we can just plug it to Auth0, and it will “just work”.
The key settings are under the Configuration menu of your skill, and will show up when you enable Account Linking.
If you are familiar with OpenID Connect, you will liekly recognize most of these parameters:
Authorization URL:https://{your Auth0 account}.auth0.com/authorize?audience=https://whatshouldiwear. Theaudience(although not strictly a spec parameter, allows Auth0 to identify the API you are requesting access to. It can be a default too and may be omitted).Client Id: this is theclient_idgenerated in Auth0 for the Alexa “client”.Scope: this was setup in the API definition. In this example it is:read:whattowear.Redirect URLs: this parameters are generated by Alexa. You need to copy these values and paste them to theAllowed Callbacksin Auth0. This is where the transaction will end once authentication completes.Access Token URI:https://{your Auth0 account}.auth0.com/oauth/token. This is the endpont Alexa will use to exchange thecodefor theaccess_token.Client Secret: is theclient_secretgenerated by Auth0 for the Alexa client.Domain List: is not strictly a OIDC standard configuration parameter. But it seems that the Alexa app in your phone (used for auth) needs a white-list of origins the web view will pull info from. If you are using Auth0, this will be mostly the CDN where we publish Lock and related content. If you want to enable Social connections with Auth0, you might also need to white-list the social connection origins.
Enabling your skill with Authentication
At this point everything is wired up. Now when you enable your skill in your phone, you will see a login and a consent screen:
The Alexa app is using a WebView to display the Identity Provider (Auth0 in this case). This is a popular technique that is a pretty good guarantee to high interoperability.
Auth0 allows you to define a “hosted” login page (among others). This hosted page is 100% customizable. You can localize, brand, apply your styles, etc.
The great thing about this, is that you can now use anything to authenticate users now: FB, Twitter, any social login really; any “enterprise system”: LDAP, AD, SAML, whatever. For a full reference see here.
One of the services Auth0 provides is protocol transition that will translate whatever you use to authenticate users and always present an OIDC head to Alexa.
The 3rd screen is the consent. It is asking the user whether it consents to provide access to the API with the defined scope. The consent screen is an authorization step. It grants the Client (Alexa) the right to call the API on their behalf, with the specific scope.
If the user allows, then the access_token is issued and shared with the Client.
Notice the authorization nature of the interaction. OIDC is built on OAuth2, essentially an authorization protocol.
Calling the API
Once the above process is complete, when the Skill is activated the API will get a request body as described in the previous post:
{
  version: '1.0',
  session:
   { new: true,
     sessionId: 'SessionId.7a933...60cc',
     application: {
      applicationId: 'amzn1.ask.skill.e3...9afc5c' },
     attributes: {},
     user: {
        userId: 'amzn1.ask.account.AHKMMAS...XLYTCHA',
        accessToken: 'eyJ0eXAiOiJKV1Qi......aNPYcl2PgHKC3NrA'
     }
  },
  request:
  {
    type: 'IntentRequest',
    requestId: 'EdwRequestId.28cc....65',
    timestamp: '2016-11-19T12:39:30Z',
     locale: 'en-US',
     intent: { name: 'WhatToWearIntent', slots: ... } } }
But the important difference now is that the session.user object contains an accessToken.
This is the access_token issued by Auth0. Inspecting its contents with jwt.io shows a payload like this:
{
  "iss": "https://{your account in auth0}.auth0.com/",
  "sub": "auth0|574......22aeb",
  "aud": "https://whatshouldiwear",
  "azp": "KfLF5g......tTa1A",
  "exp": 1479645508,
  "iat": 1479559108,
  "scope": "read:whattowear"
}
Now your API has the information it needs to decide whether to allow access or not:
- Which is the app is requesting this?
- The
azp(authorized party) claim that equals the Alexaclientid.
- The
- Who is the user this request is coming on behalf of?
- The
sub(subject) claim that matches theuser_idused at login.
- The
- What resource is trying to access?
- The
aud(audience) claim that matches theAPI identifier.
- The
- What scope of permission has been granted?
- The
scopeclaim.
- The
- Who is the authority claiming all these statements?
- The
issuerclaim, indicating it is Auth0.
- The
And since this access_token is a JWT, it also contains the cryptographic assurance that the payload has not been tampered with.
Enforcing security in the API
I wrote my API as a Webtask. As a reminder, the baseline code looks like:
'use latest';

import bodyParser from 'body-parser';
import express from 'express';
import Webtask from 'webtask-tools';

const server = express();
server.use(bodyParser.json());

server.post('/',(req, res) => {
  res.json({
            version: '1.0',
            response: {
              outputSpeech: {
                type: 'PlainText',
                text: 'Long pants, short sleeves, jacket in the afternoon'
              },
              shouldEndSession: true
            },
            sessionAttributes: {}
          });
});

module.exports = Webtask.fromExpress(server);
We just need to add some extra code that will:
- Check we have an
accessTokenon each request. - Check that the
accessTokenis valid for us.
This 2nd. check has a number of potential steps:
- Is the token properly formatted?
- Is the token signed from a trusted authority?
- Is the token intended for this API?
- Has the token expired?
- Is the user allowed to execute this operation?
- Is the operation requested within the scope granted?
If all these match, then execution of the actual operation would proceed. If any of these fail, then the API rejects the request.
Fortunately, there are many libraries that will assist with the above steps.
Notice that in other APIs, the
access_tokenwould be transmitted on theAuthorizationheader. In Alexa, it is part of the request body. So standardexpressmiddlewares will not work.
That’s it!