Building Secure Alexa Skills - Part I
Dec 27th, 2023 update: Webtasks have been deprecated.
These two posts are largely based on a proof of concept project developed by my friend Pushp Abrol for a customer. Thanks Pushp for your guidance!
Alexa is the voice service that powers the Amazon Echo device. It is surprisingly easy to work with as a developer.
In this post I share:
- The basic setup of an Alexa Skill
- Developing an API that Alexa calls for that Skill
The demo skill I’ll be using is What Should I Wear Today?. (The question my son asks every morning :-) ). When you ask Alexa: “Alexa, ask Maggie what should I wear today” it will respond Long sleeves, long pants, jacket.
For this article, there’s no real back end. A real service would connect with a weather API and perhaps your calendar to check what to actually wear. That’s a future post, or an exercise for the reader.
The overall solution looks like this:
Once everything is done and wired you would:
- Enable the skill using your Alexa mobile app.
- Talk to Alexa.
- Optionally use a simulator like the excellent Echosim.
In part II, I’ll cover how to secure the API and how Alexa negotiates the proper access_token, so the API is secure.
Building the API
Alexa communicates with your API over HTTPS. It expects an endpoint where the commands are POST’ed and a response is sent back with instructions on what Alexa should respond back to you.
I use Auth0 Webtasks to host the API. This allows for very fast iterations, no hosting, and an overall awesome experience. In seconds, I have a published, Express based API. Just fire up Webtask Studio (the online editor):
'use latest';

import bodyParser from 'body-parser';
import express from 'express';
import Webtask from 'webtask-tools';

const server = express();
server.use(bodyParser.json());

server.post('/',(req, res) => {
  res.json({
            version: '1.0',
            response: {
              outputSpeech: {
                type: 'PlainText',
                text: 'Long pants, short sleeves, jacket in the afternoon'
              },
              shouldEndSession: true
            },
            sessionAttributes: {}
          });
});

module.exports = Webtask.fromExpress(server);
At this stage, the WT really doesn’t do much. It just serves back a hard-coded JSON object following the Alexa schema:
{
  "version": "1.0",
  "response": {
    "outputSpeech": {
      "type": "PlainText",
      "text": "Long pants, short sleeves, jacket in the afternoon"
    },
    "shouldEndSession": true
  },
  "sessionAttributes": {}
}
But this will give us an addressable endpoint (e.g. https://{YOUR Webtask domain}/alexa)
Defining the Alexa skill
The very first things you need to do is:
- Login on Amazon developer portal
- Go to Alexa
- Click on Build a new Alexa skill
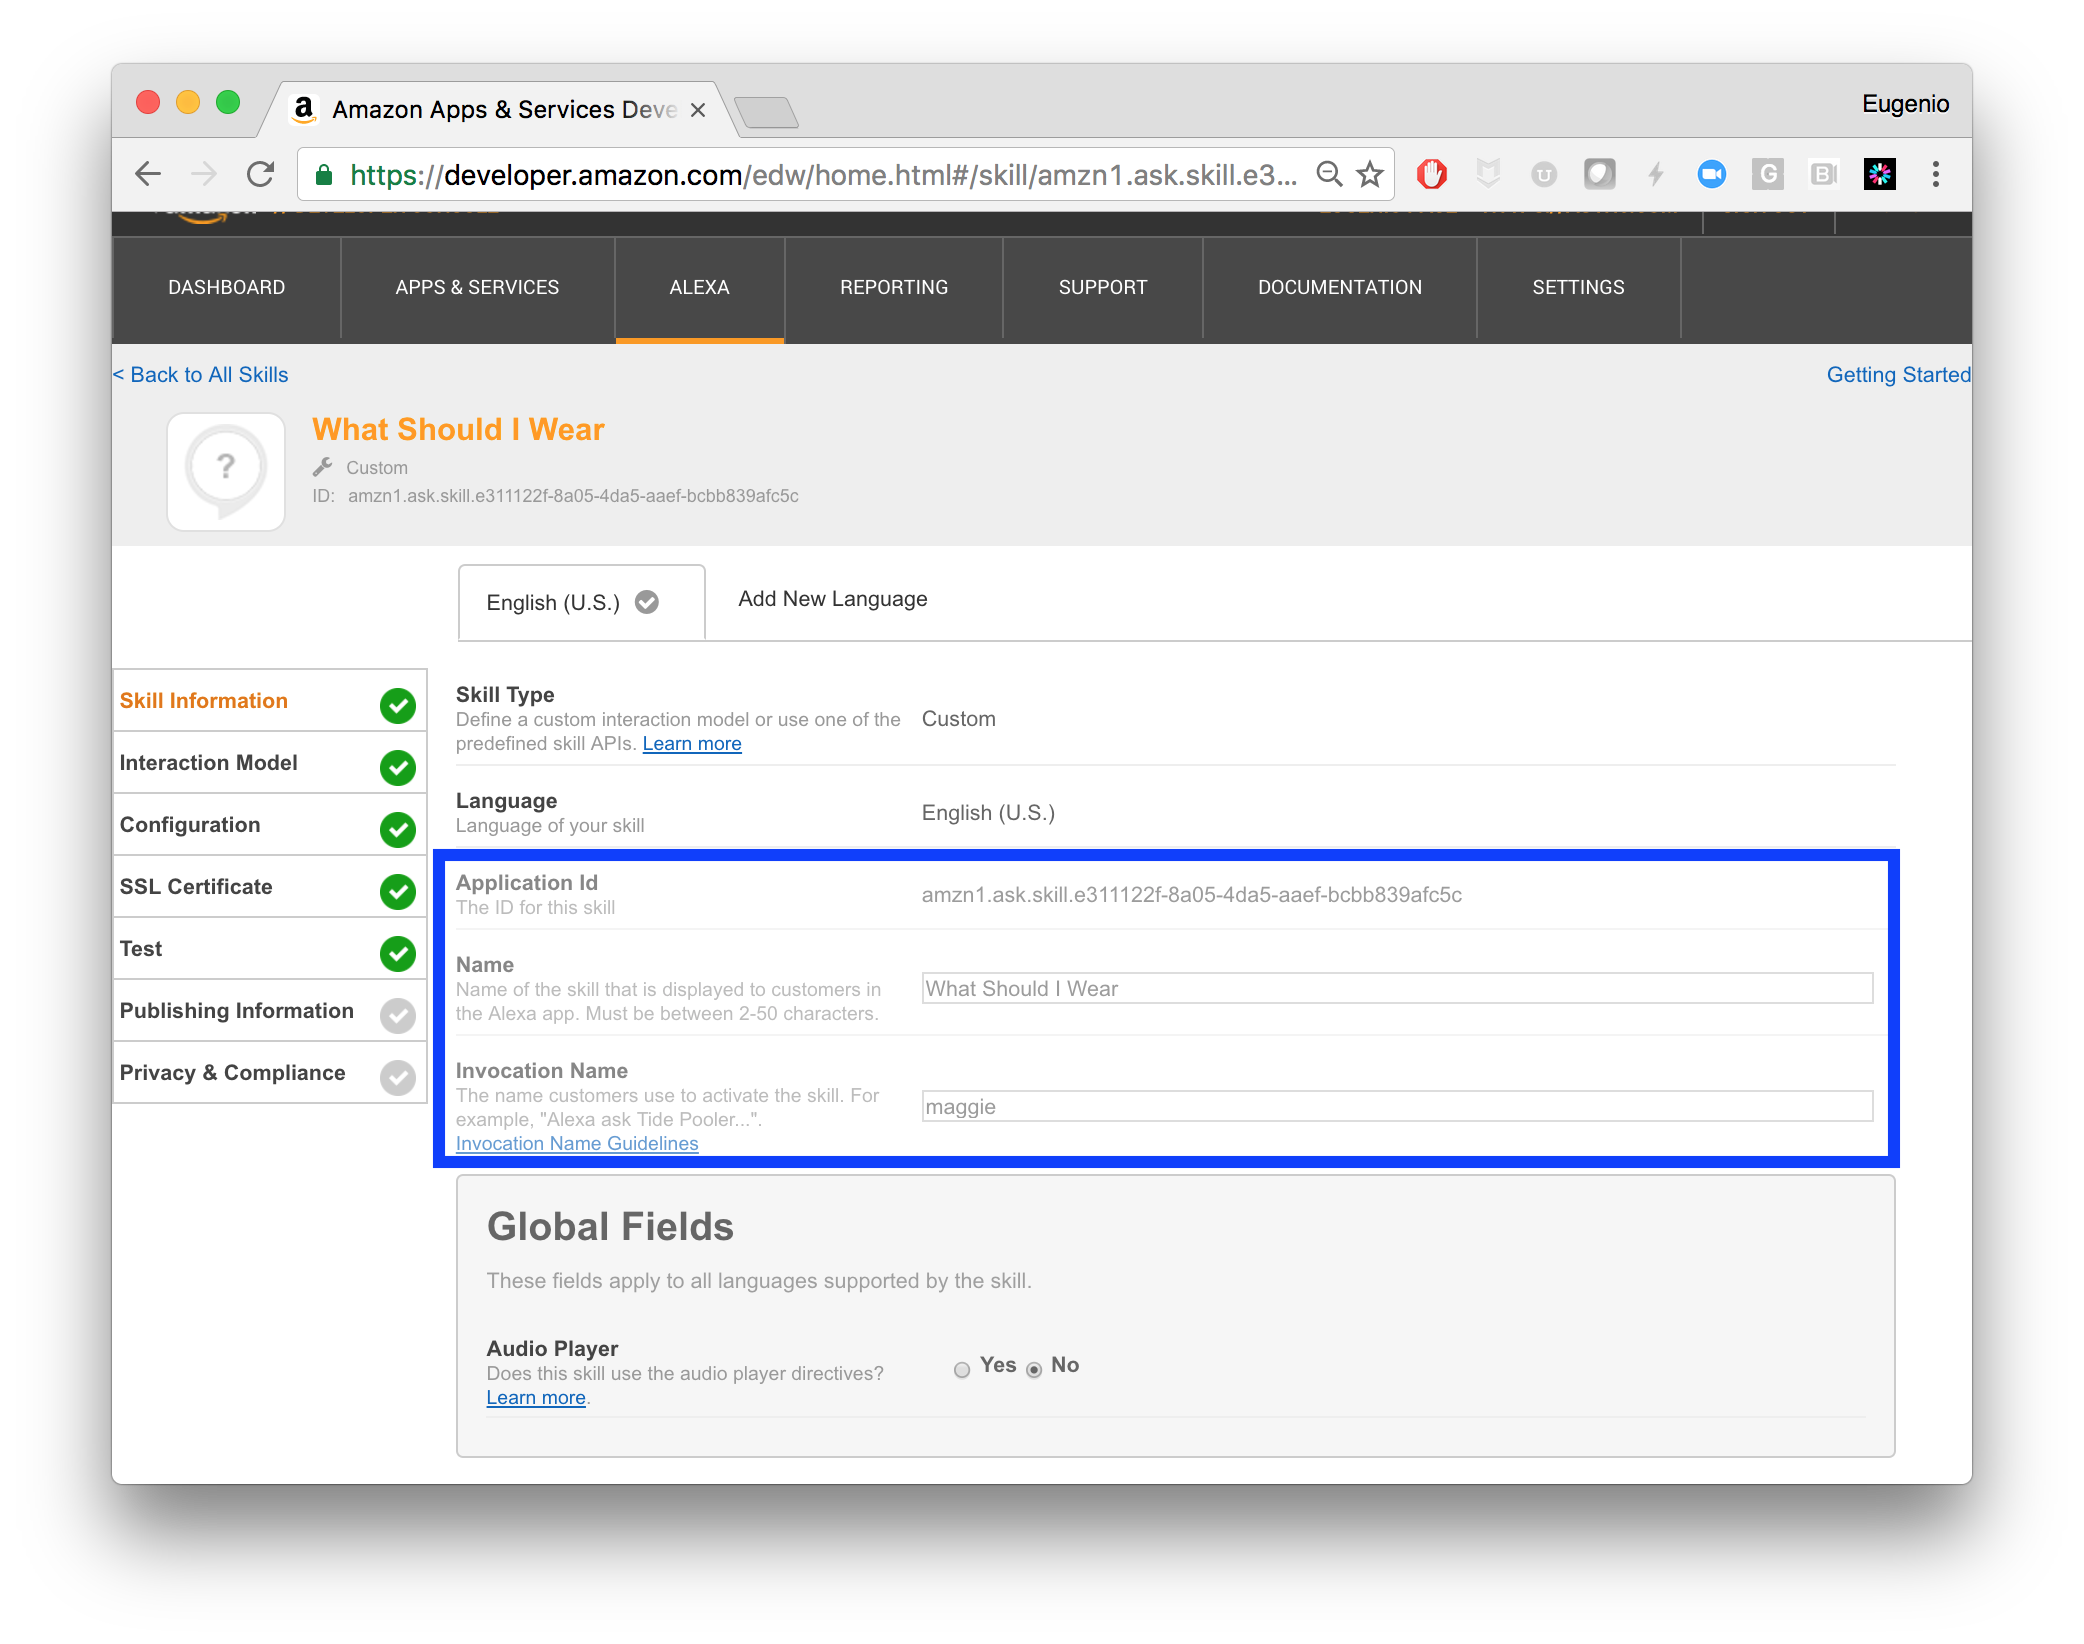
There are a few things you need to complete to get your basic Skill setup, but the most important ones are:
- The
Name - The
Invocation Name - Also, take note of the
AppId. You will need this later.
The invocation name is what Alexa recognizes when you say Alexa, ask {Invocation Name}….

I’m using Maggie.
The interaction models
The next step is to define the “intents” and the “utterances”. I’m not going to spend much on this, but simply to say that this is how you tell Alexa how to parse your commands. In my sample app, it look like this:
Intent
{
  "intents": [
    {
      "intent": "WhatToWearIntent",
      "slots": [
        {
          "name": "Date",
          "type": "AMAZON.DATE"
        }
      ]
    },
    {
      "intent": "AMAZON.HelpIntent"
    }
  ]
}
Notice the variable “Date”. Alexa will properly interpret if you say “today” or “tomorrow”, and translate it to an actual Date.
Utterances
WhatToWearIntent what to wear {Date}
WhatToWearIntent what should I wear {Date}
WhatToWearIntent what clothes should I wear {Date}
WhatToWearIntent wear {Date}
These are the different possible ways you might talk to Alexa.
Skill configuration
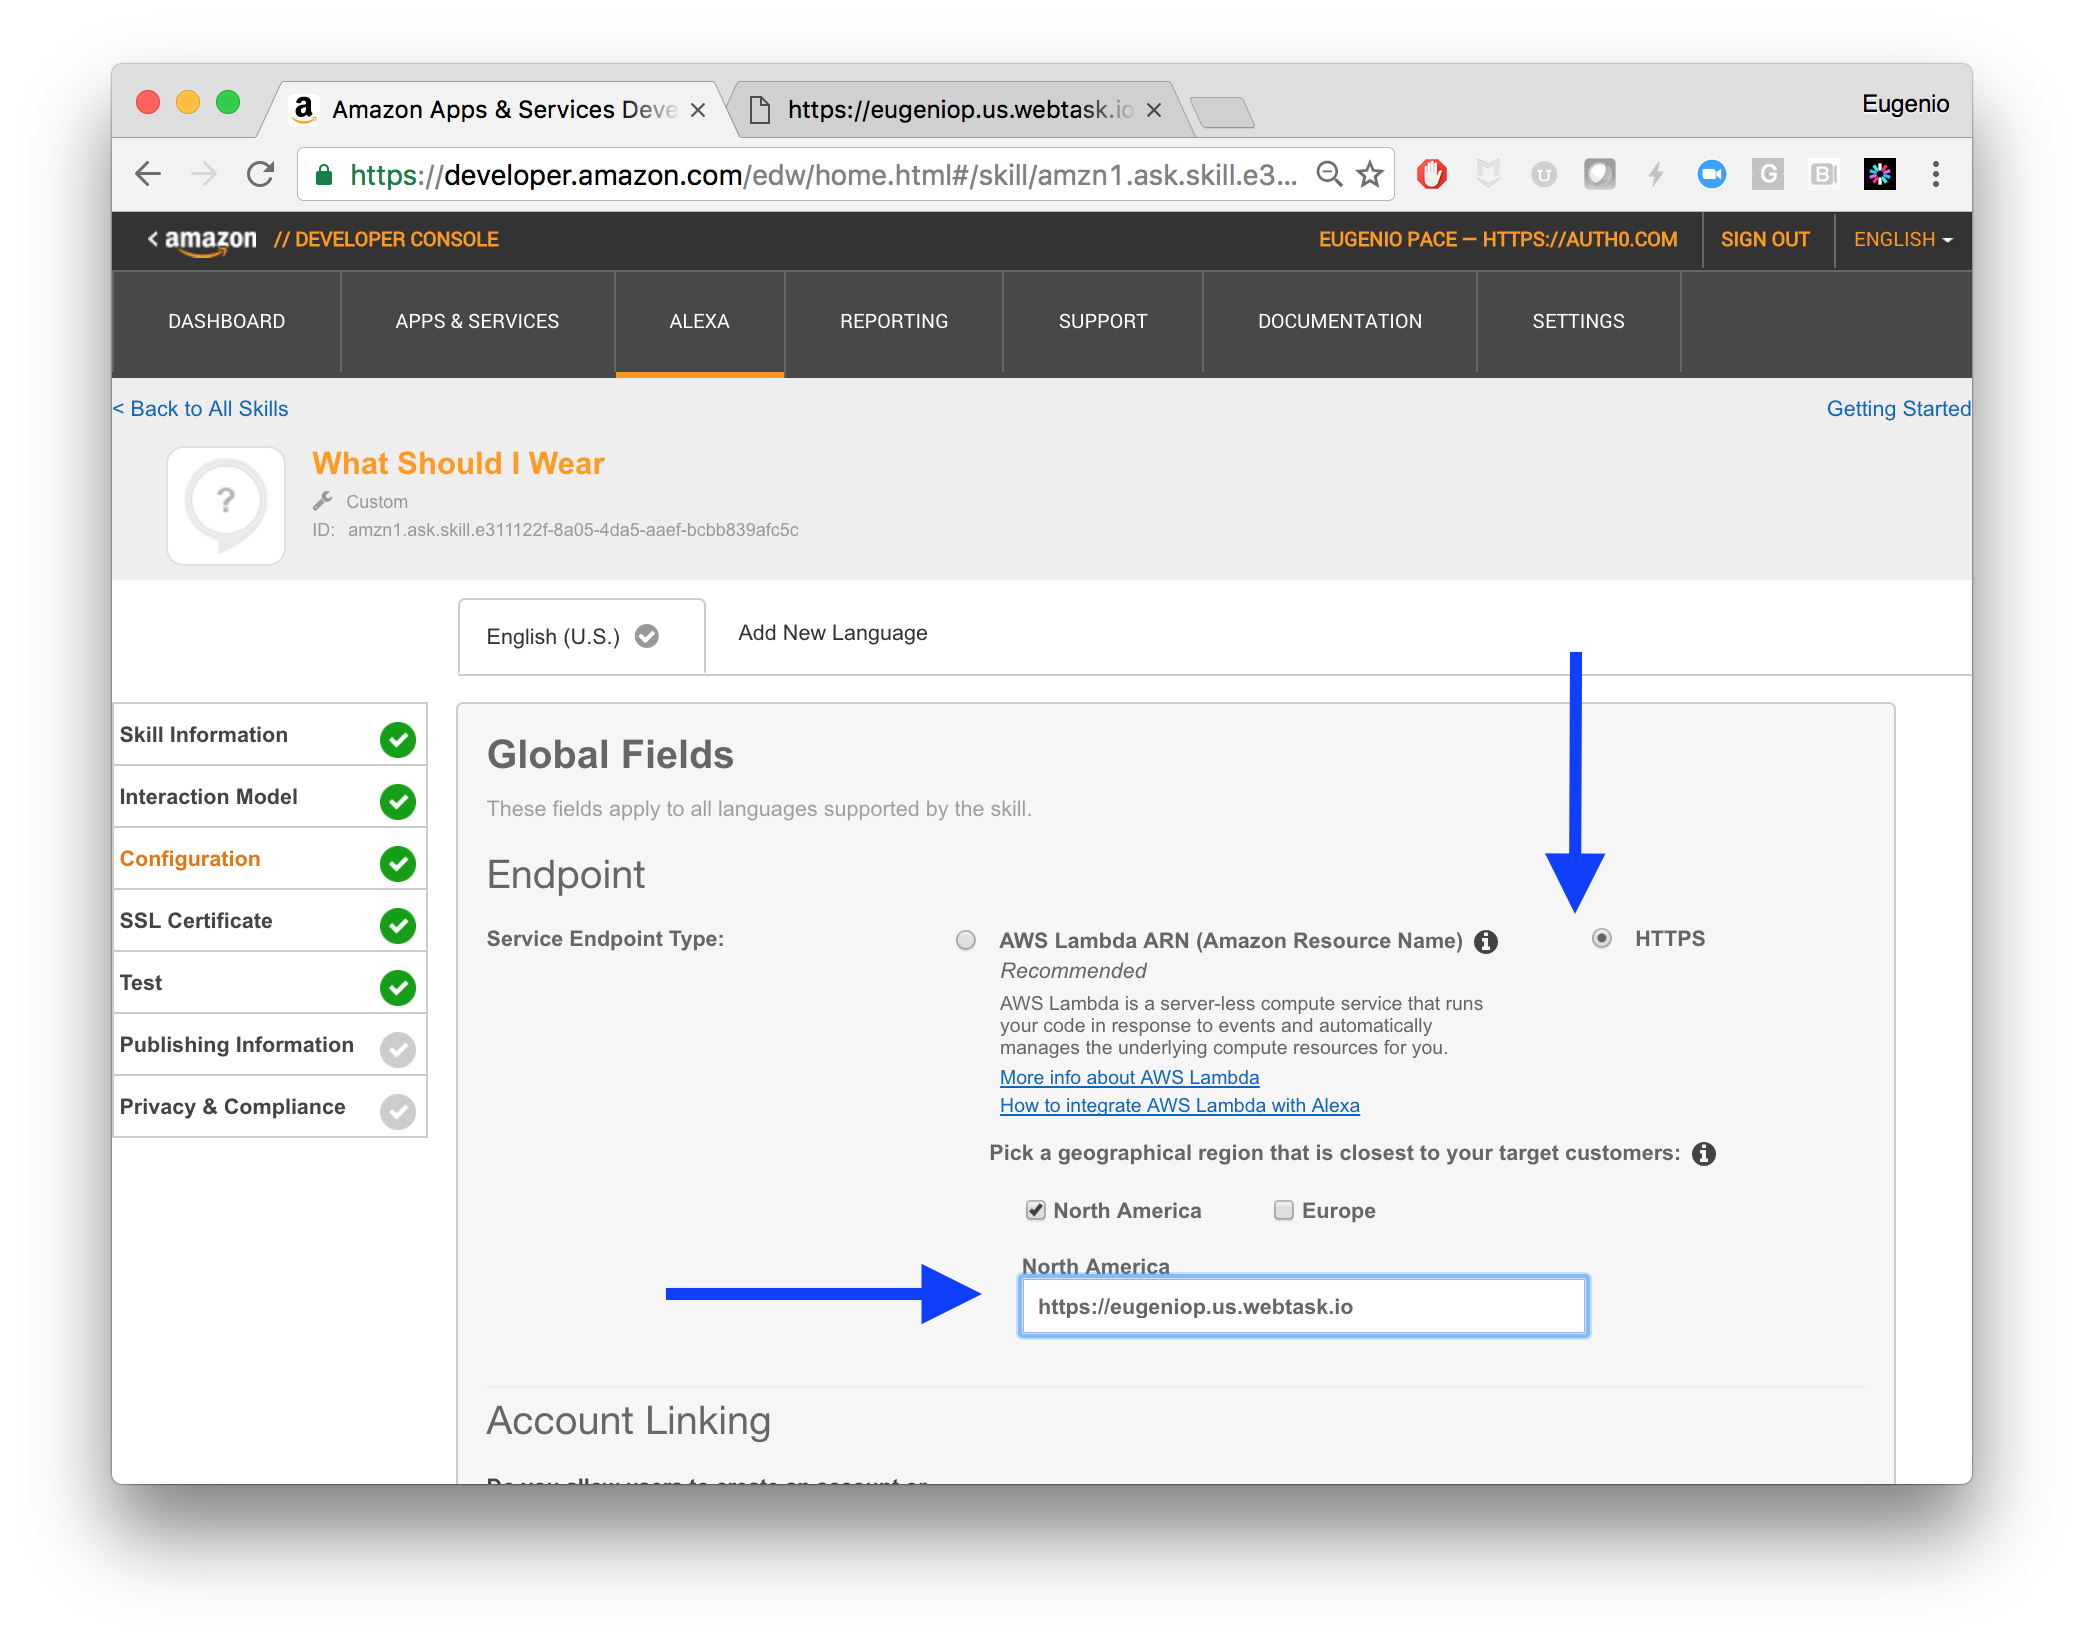
And here we arrive at the most important part: configuring the server that will process the request. This is the actual Skill. Thankfully, Alexa allows you to delegate this to an arbitrary endpoint:

This will be pointing to the Webtask defined above. In Part II, I’ll come back to the next section Account Linking. This is critical to setting up a secure endpoint. For the time being, leave Linking off.
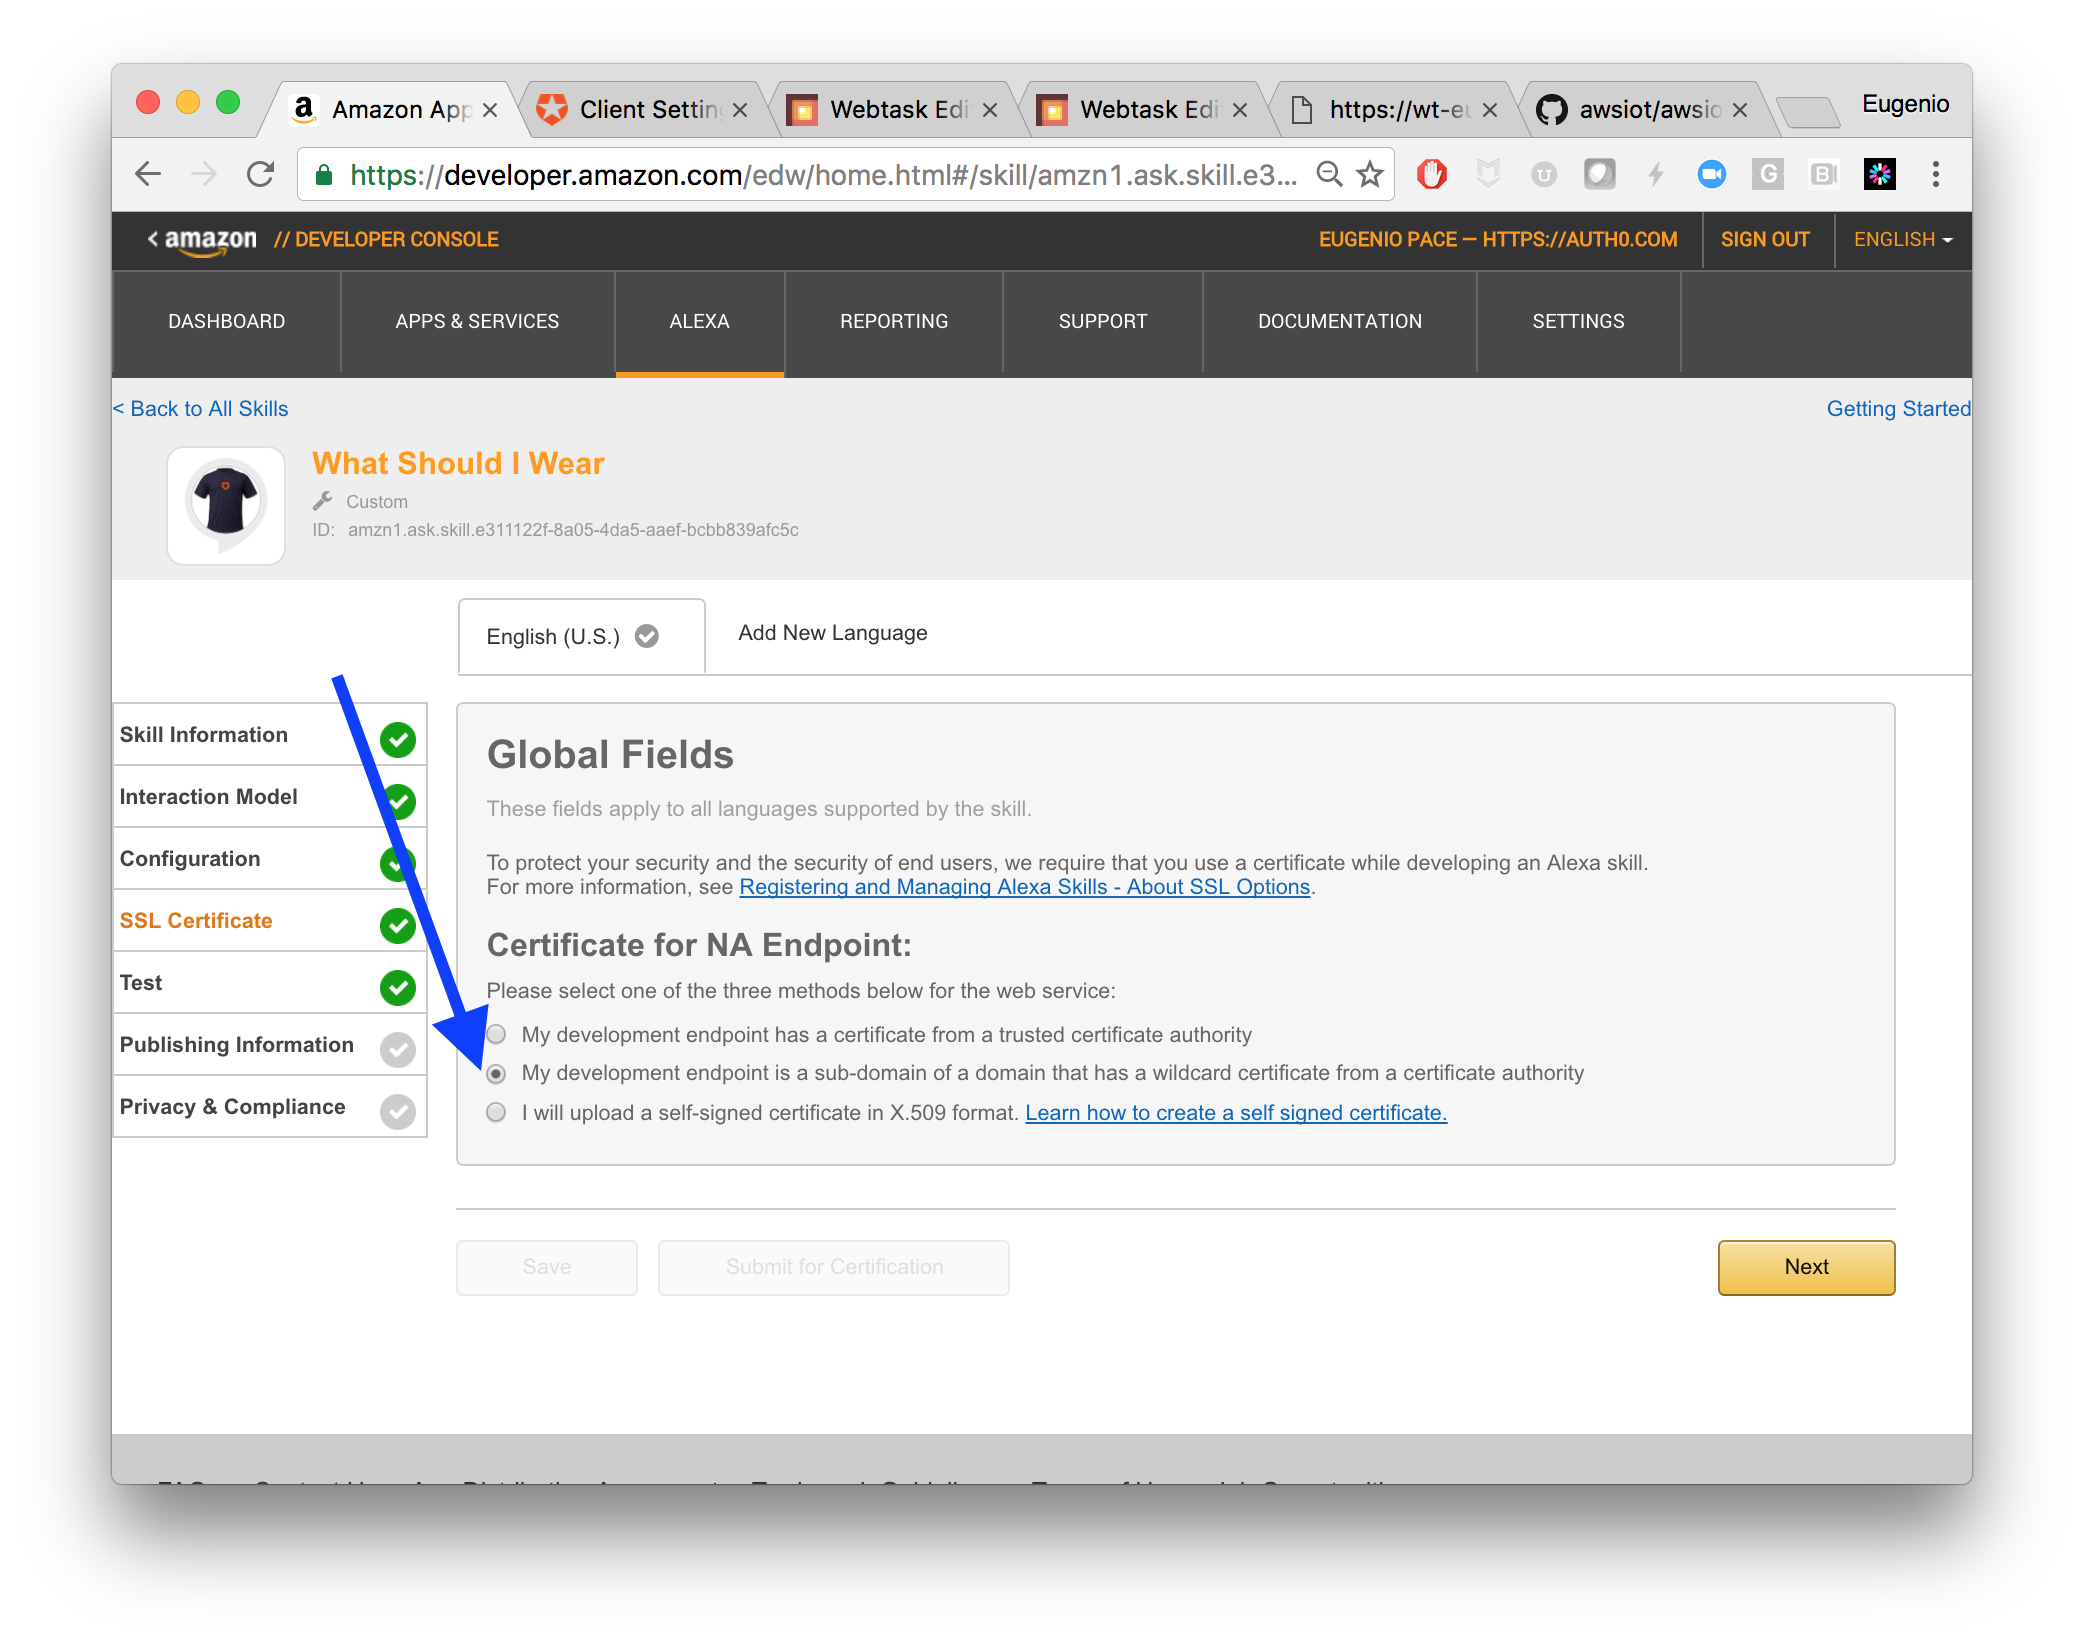
Certificates
Because my API is hosted by Webtask, I chose the sub-domain option:

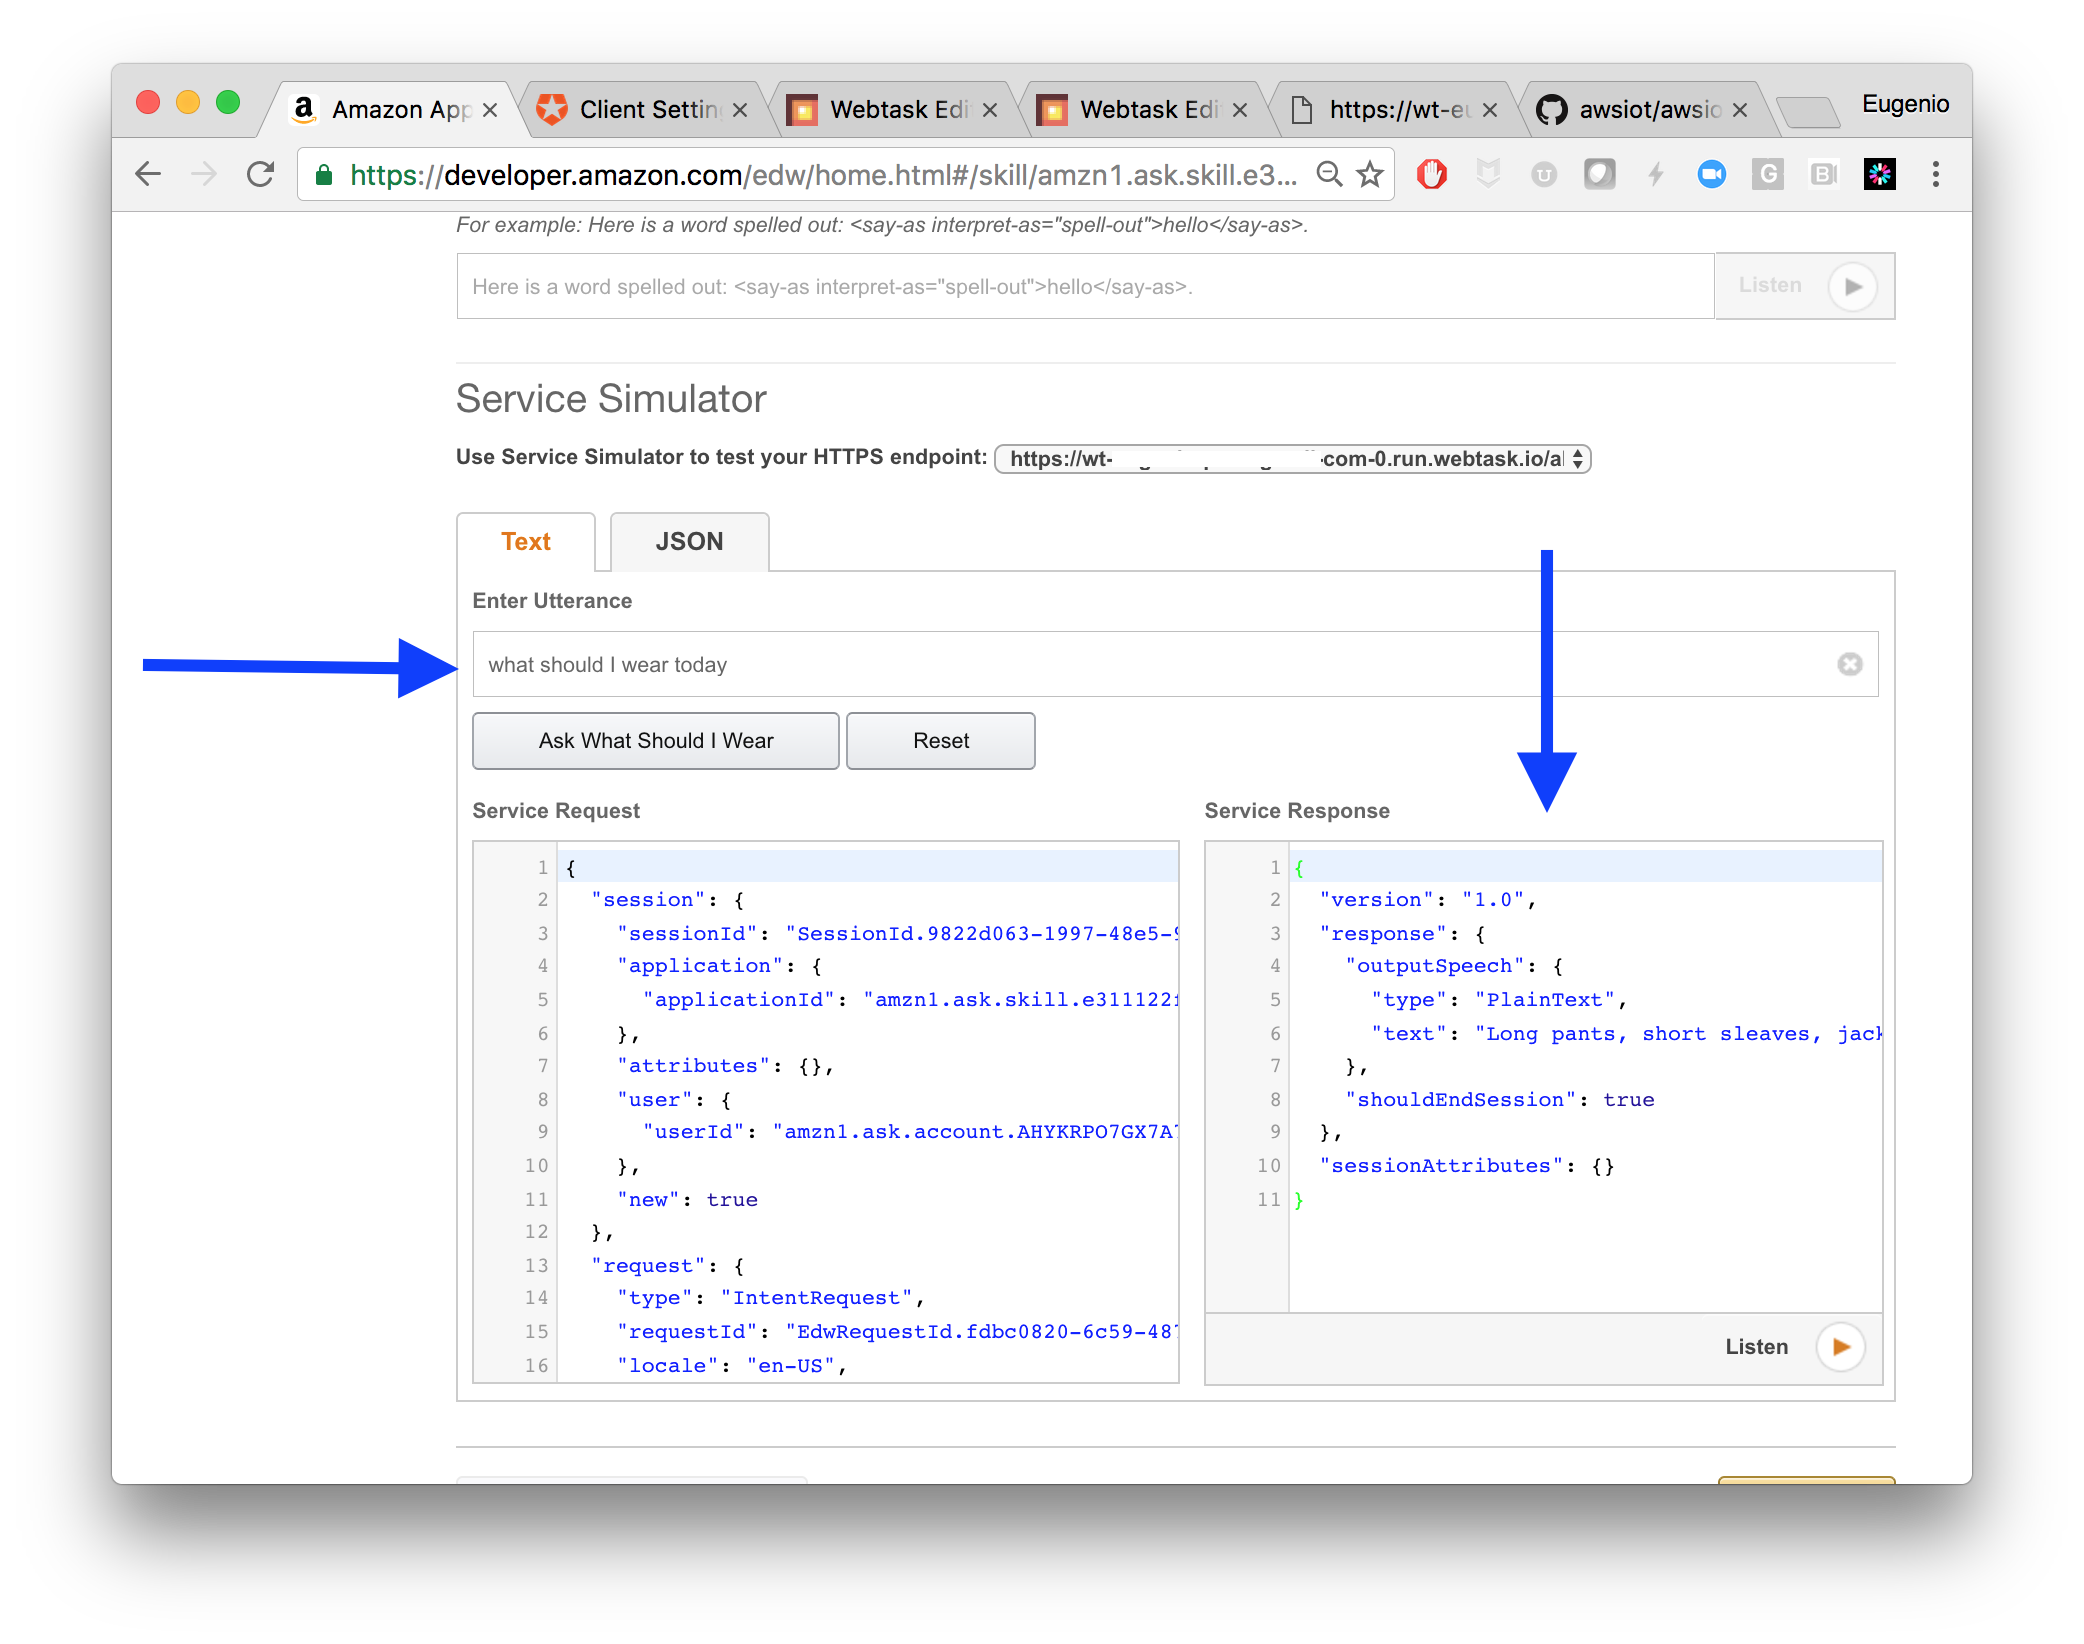
Testing, testing
Last step, I test that everything is correctly wired. Alexa provides a nice sandbox. Type what you would say and voila…

If all works well, you will see the same JSON object defined in the API. Clicking on “Listen” will let you hear exactly what an Echo device would respond to you.
It is worth taking a look at the object that Alexa POSTs to the API (see the left pane), as we will need that later on:
{
  "session": {
    "sessionId": "SessionId.9822d....37f4",
    "application": {
      "applicationId": "amzn1.ask.skill.e311....c5c"
    },
    "attributes": {},
    "user": {
      "userId": "amzn1.ask.account.AHYKR.....66PQYA"
    },
    "new": true
  },
  "request": {
    "type": "IntentRequest",
    "requestId": "EdwRequestId.fdbc0....184ce8",
    "locale": "en-US",
    "timestamp": "2016-11-13T01:02:59Z",
    "intent": {
      "name": "WhatToWearIntent",
      "slots": {
        "Date": {
          "name": "Date",
          "value": "2016-11-13"
        }
      }
    }
  },
  "version": "1.0"
}
For a full reference on custom skill JSON interface, see here.
Everything is ready for a real test run. Just enable the skill in your mobile Alexa app and talk to your Echo.
Security
There’s no security whatsoever at this stage. In a real app, you will want requests to be accepted only from trusted clients. In this architecture, the client of the API is Alexa itself.
Fortunately for us, Amazon designed Alexa in such a way, that 3rd. party security is (surprisingly) easily enabled. And that will be the main focus for Part II.