3D Printing parts for an old Märklin freight car
I love seeing old trains back in action, and there’s no better way to do that than by buying vintage pieces at a train show.
Not too long ago, I found one of my favorite cars: the iconic Märklin Tiefladewagen 4167 (Tiefladewagen is German for “low-loader wagon”—what we’d call a “depressed center flatcar” in the U.S.). This model carries a large electric transformer as its payload. The 4168 is a similar Tiefladewagen, but with a large wooden crate instead.
The piece was in generally good shape, and it even came with an almost intact box. However, a few parts were missing: a couple of wheels, a coupler, and—most critically—three isolators that are part of the transformer. The price was unbeatable, costing less than a latte nowadays, so I brought it home.
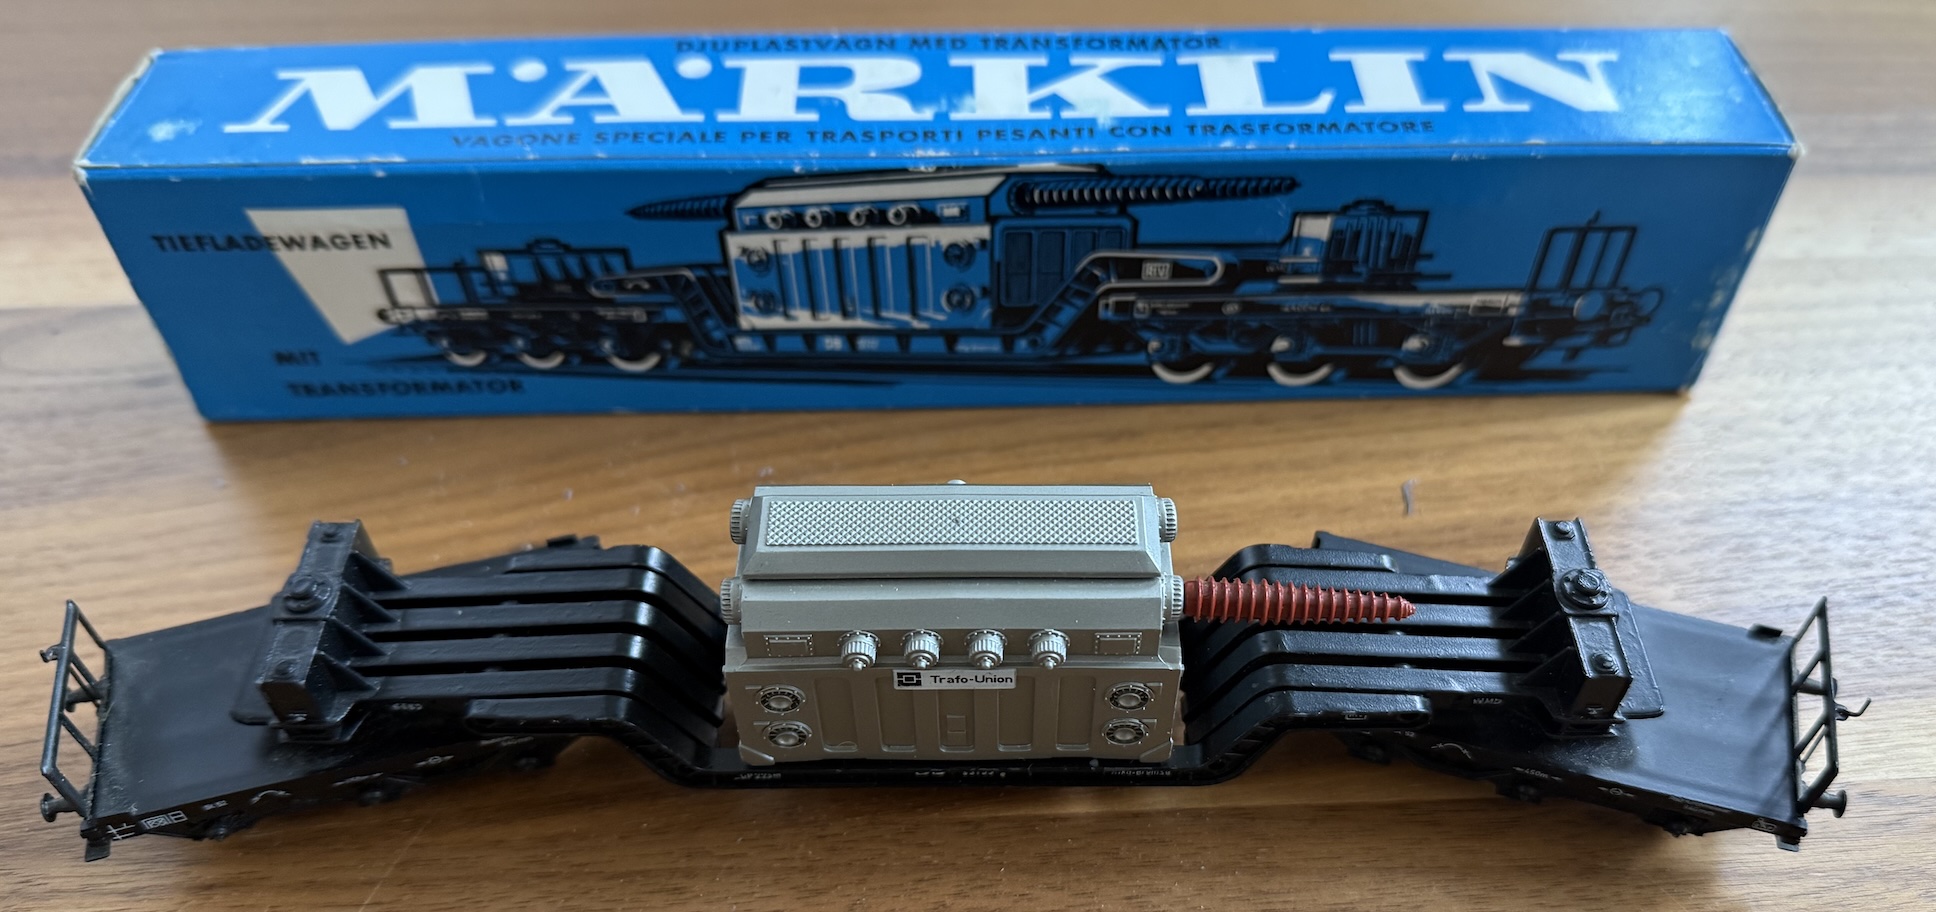
The coupler and wheels were an easy fix, as these parts are readily available, and I had a few spares. There were some bends in the metal parts, which were also simple to straighten. The isolators, however, were a different story. I couldn’t find any suitable replacements in the usual places. I’m sure I could have located them with a more extensive search, but I wasn’t in the mood for more online browsing. Instead, I decided to try making them myself using a resin 3D printer.
Designing and Printing the Isolators
Printing was the easy part; designing the part took more time. I’m not an expert CAD user and have no formal design training, but I enjoy a challenge. So, I opened TinkerCAD and started working on my design.
TinkerCAD is basic and easy to learn, and I highly recommend it to any beginner like me. It essentially works by adding and subtracting basic shapes. For example, if you want to build a pipe, you start with a solid cylinder and subtract a smaller cylinder from its center:
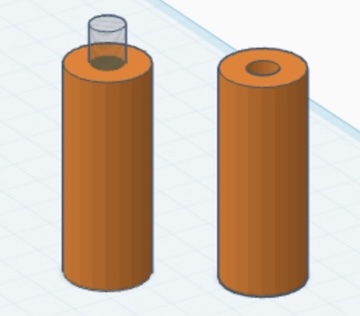
By combining multiple shapes, you can create surprisingly complex components. It’s a bit tedious on this platform, but entirely doable.
While surprisingly powerful for a web only tool, more sophisticated users would likely be better off with more advanced platforms like TinkerCAD’s bigger brother Autodesk Fusion.
Building the isolator
Fortunately, my car still had one original isolator, which I could use as a reference. Using a caliper, I carefully measured each section.
At first glance, the isolator might seem difficult to replicate, but it turned out to be relatively straightforward. My version consists of 41 combined pieces:
- The core is made of a couple of cylinders and a paraboloid.
- The rings consist of 17 toruses sliced in half, each with progressively smaller radii.
- The tip is formed by stacking a couple of tiny cylinders.

I initially printed a few pieces on a filament printer. While the results were decent, a friend of mine had recently acquired an Elegoo resin printer and offered to print them for me. The resin-printed parts came out beautifully, with almost no imperfections—just a bit of light sanding needed. See for yourself:
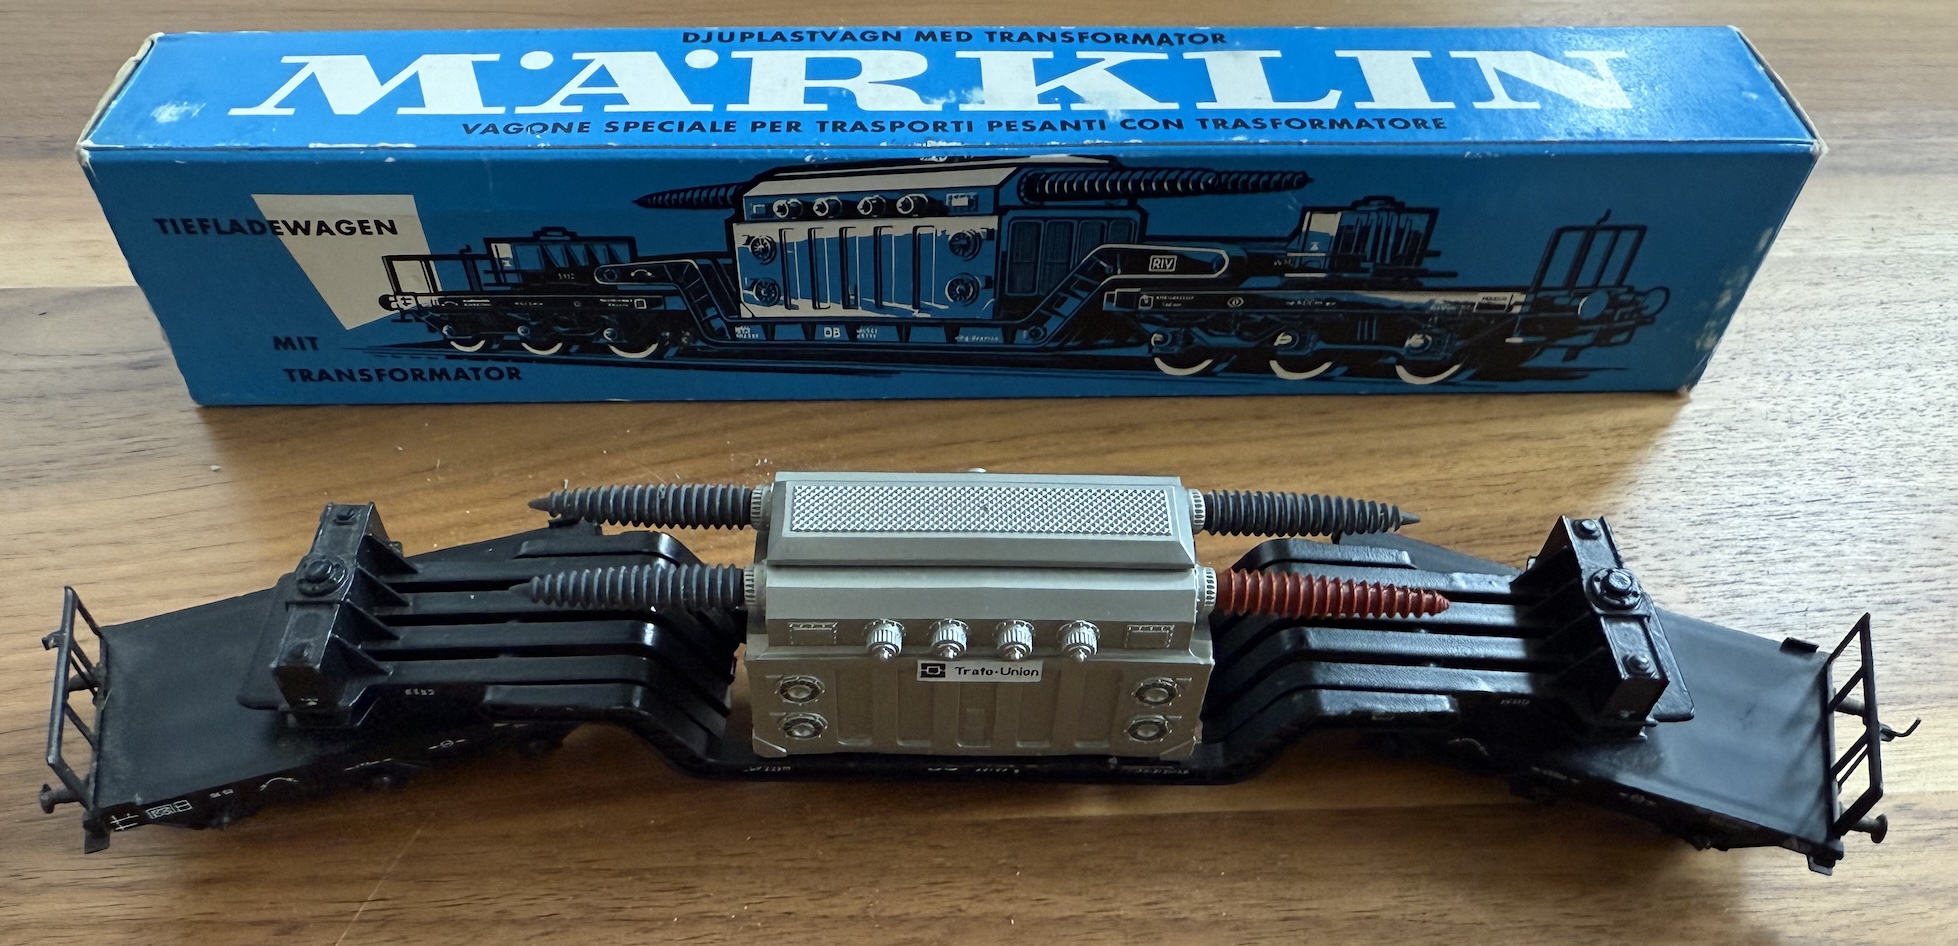
A fresh coat of paint is all that’s left to make it look (almost) brand new.
I know that some model train purists prefer using only original parts, and I respect that. However, I take a more pragmatic approach. For me, this was both a fun and rewarding design project.
That said, even purists might appreciate how 3D printing opens up entirely new possibilities. Imagine the variety of heavy cargo we could design for these flatbed cars—not just transformers and crates, but all sorts of custom loads.
Final Thoughts & Resources
The quality of 3D printing has advanced significantly over the years, making it a viable alternative for scratch builders. Plus, there’s the added advantage of sharing designs with fellow enthusiasts.