Experiments with e-Paper displays
Our board member Peter Van Hardenberg got me intrigued on e-Paper displays. So I went to Adafruit to check what was available for the Feather M0. I figured it would be a nice extension to my original printer project, to replace the printer with a display. Also gives me a chance to work on a low power project that can work on batteries for a long time. Low power consumption is one of the benefits of e-Paper, after all.
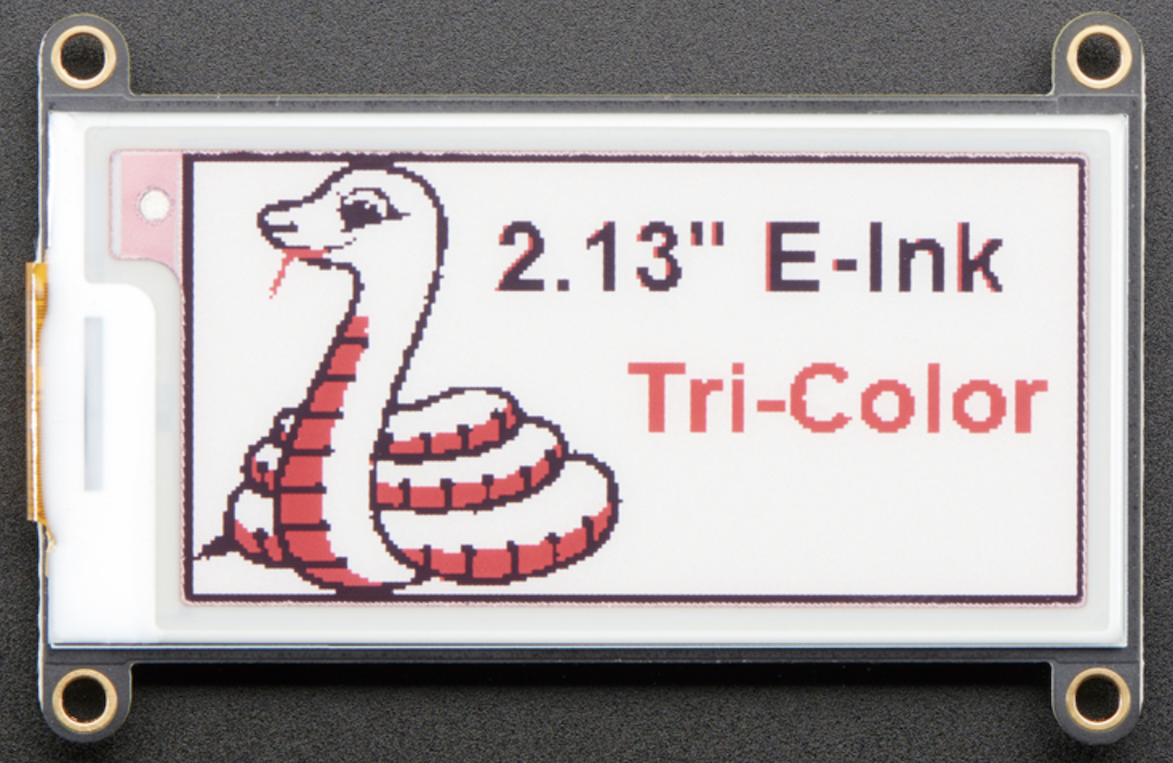
Adafruit has a wide range of e-paper (or e-Ink) displays and one that fits perfectly for the Feather M0. It even comes all set for plug and play. Twenty-something dollars and a few days later I received my display, and I set out to work on it in preparation for a few demos I am doing in Buenos Aires.
I ended up buying the 2.13” tri-color display (white, black, red) because, why not?
Adafruit also publishes a very thorough library that makes it dead simple to interface with the display. All looked very promising. Alas, there’s always something. Otherwise, it wouldn’t be fun!
Wiring
The nice thing about this model is that there’s no wiring required. You simply plug the display to the board. Very compact, simple, and straightforward:

The display uses the SPI (shared with the onboard WiFi). It also comes with a handy SD card. So it needs a few extra I/O pins to select one or the other.
Hello World!
It was unexpectedly hard to make the display work right away. In hindsight, a couple of links here and there on some of the tutorials would have saved me some time.
This article which unfortunately lied somewhat buried in Adafruit’s docs saved the day. It turns out that each board has a different pin configuration. Moreover, most of the examples I saw online (e.g. GitHub or Adafruit site) were not specifically for the M0. So pinouts did not work.
If you are using the Feather M0 + this particular display the configuration looks like this:
#define SRAM_CS     6
#define EPD_CS      9
#define EPD_DC      10
#define EPD_RESET   -1 // can set to -1 and share with microcontroller Reset!
#define EPD_BUSY    -1 // can set to -1 to not use a pin (will wait a fixed delay)

Adafruit_IL0373 epd(212, 104 ,EPD_DC, EPD_RESET, EPD_CS, SRAM_CS, EPD_BUSY);
With the proper configuration, the Hello world is really trivial:
#include <Adafruit_GFX.h>
#include <Adafruit_EPD.h>
#include <Fonts/FreeSans9pt7b.h>

// ESP32 settings
#define SRAM_CS     6
#define EPD_CS      9
#define EPD_DC      10
#define LEDPIN      13
#define EPD_RESET   -1 // can set to -1 and share with microcontroller Reset!
#define EPD_BUSY    -1 // can set to -1 to not use a pin (will wait a fixed delay)

Adafruit_IL0373 epd(212, 104 ,EPD_DC, EPD_RESET, EPD_CS, SRAM_CS, EPD_BUSY);

const GFXfont *qfont = &FreeSans9pt7b;

void setup() {
  Serial.begin(115200);
  while(!Serial);

  epd.begin();
  Serial.println("ePaper display init");
  epd.clearBuffer();

  epd.setTextColor(EPD_BLACK);
  epd.setFont(qfont);
  epd.setTextSize(1);

  epd.setCursor(5, 5);
  epd.print("hello world!");

  epd.display();
  Serial.println("Done!");
  epd.powerDown();
}

void loop() {
}
Pre-requisites
You need a couple of libraries for this to compile:
- Adafruit GFX Library (core graphics library, where Fonts come from for example)
- Adafruit EPD (the main library for the display)
An Inspirational Quote Display
Coincidentally, Adafruit published an excellent tutorial that does exactly this! The source of the quotes is an endpoint on their website. Also, the tutorial has many goodies in it: wrap text functions, compute font height, draw beautiful borders, etc. So I just reused of all of that and adapted all the code in my printer to output on the display itself.
Refactoring the Printer class
The original Printer class was meant to abstract, well… a printer, so it included primitives like Feed, SetSize, Justify, etc. I figured I would abstract further and have higher level methods:
void PrintActivation(String url, String code);
void PrintQuote(String quote, String author);
For example, the Authenticator class in my previous implementation would do this:
  ...
  const char * verification_url_complete = (*authzJSON)["verification_uri_complete"];
  const char * user_code = (*authzJSON)["user_code"];

  printer->SetSize('S');
  printer->Justify('L');
  printer->PrintLn("Please visit this URL: " + String(verification_url_complete));
  printer->Feed(1);
  printer->PrintLn("If prompted, please enter this code when prompted:");
  printer->SetSize('L');
  printer->Justify('C');
  printer->Print(String(user_code));
  printer->Feed(1);
  printer->PrintBitmap(activate_width, activate_height, activate_data);
  printer->Feed(4);
  ...
All of that is now:
printer->PrintActivation(verification_url_complete, user_code);
So I can now have two implementations: the actual paper printer and the e-paper one.
Device Flow
The display uses the same authentication flow: OAuth 2.0 Device Authorization Grant. 99% of the code is the same, only now I print the activation URL on a QRCode on the display:
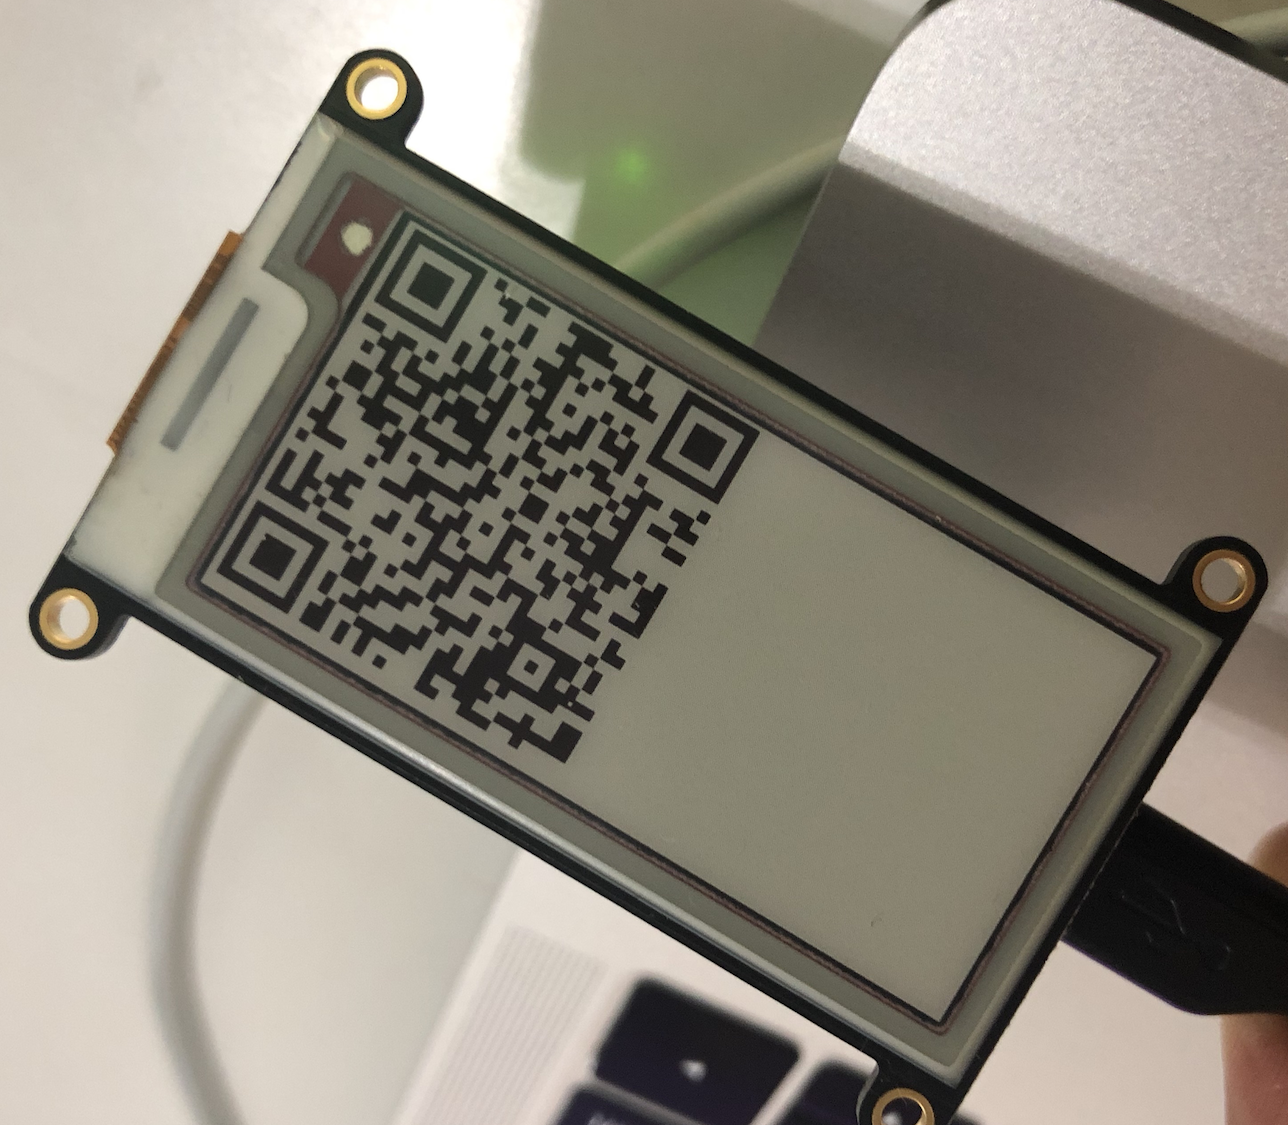
An iPhone camera pointing to this picture above should prompt for navigation on Safari (or your browser).
In the next post I’ll explain how a draw the QRCode. Turned out to be quite simple!
Future developments
I have not yet made final adjustments to make all this work with a battery. However, it should not be that hard. The display continues to show whatever you print on it even after losing all power, which is very neat.
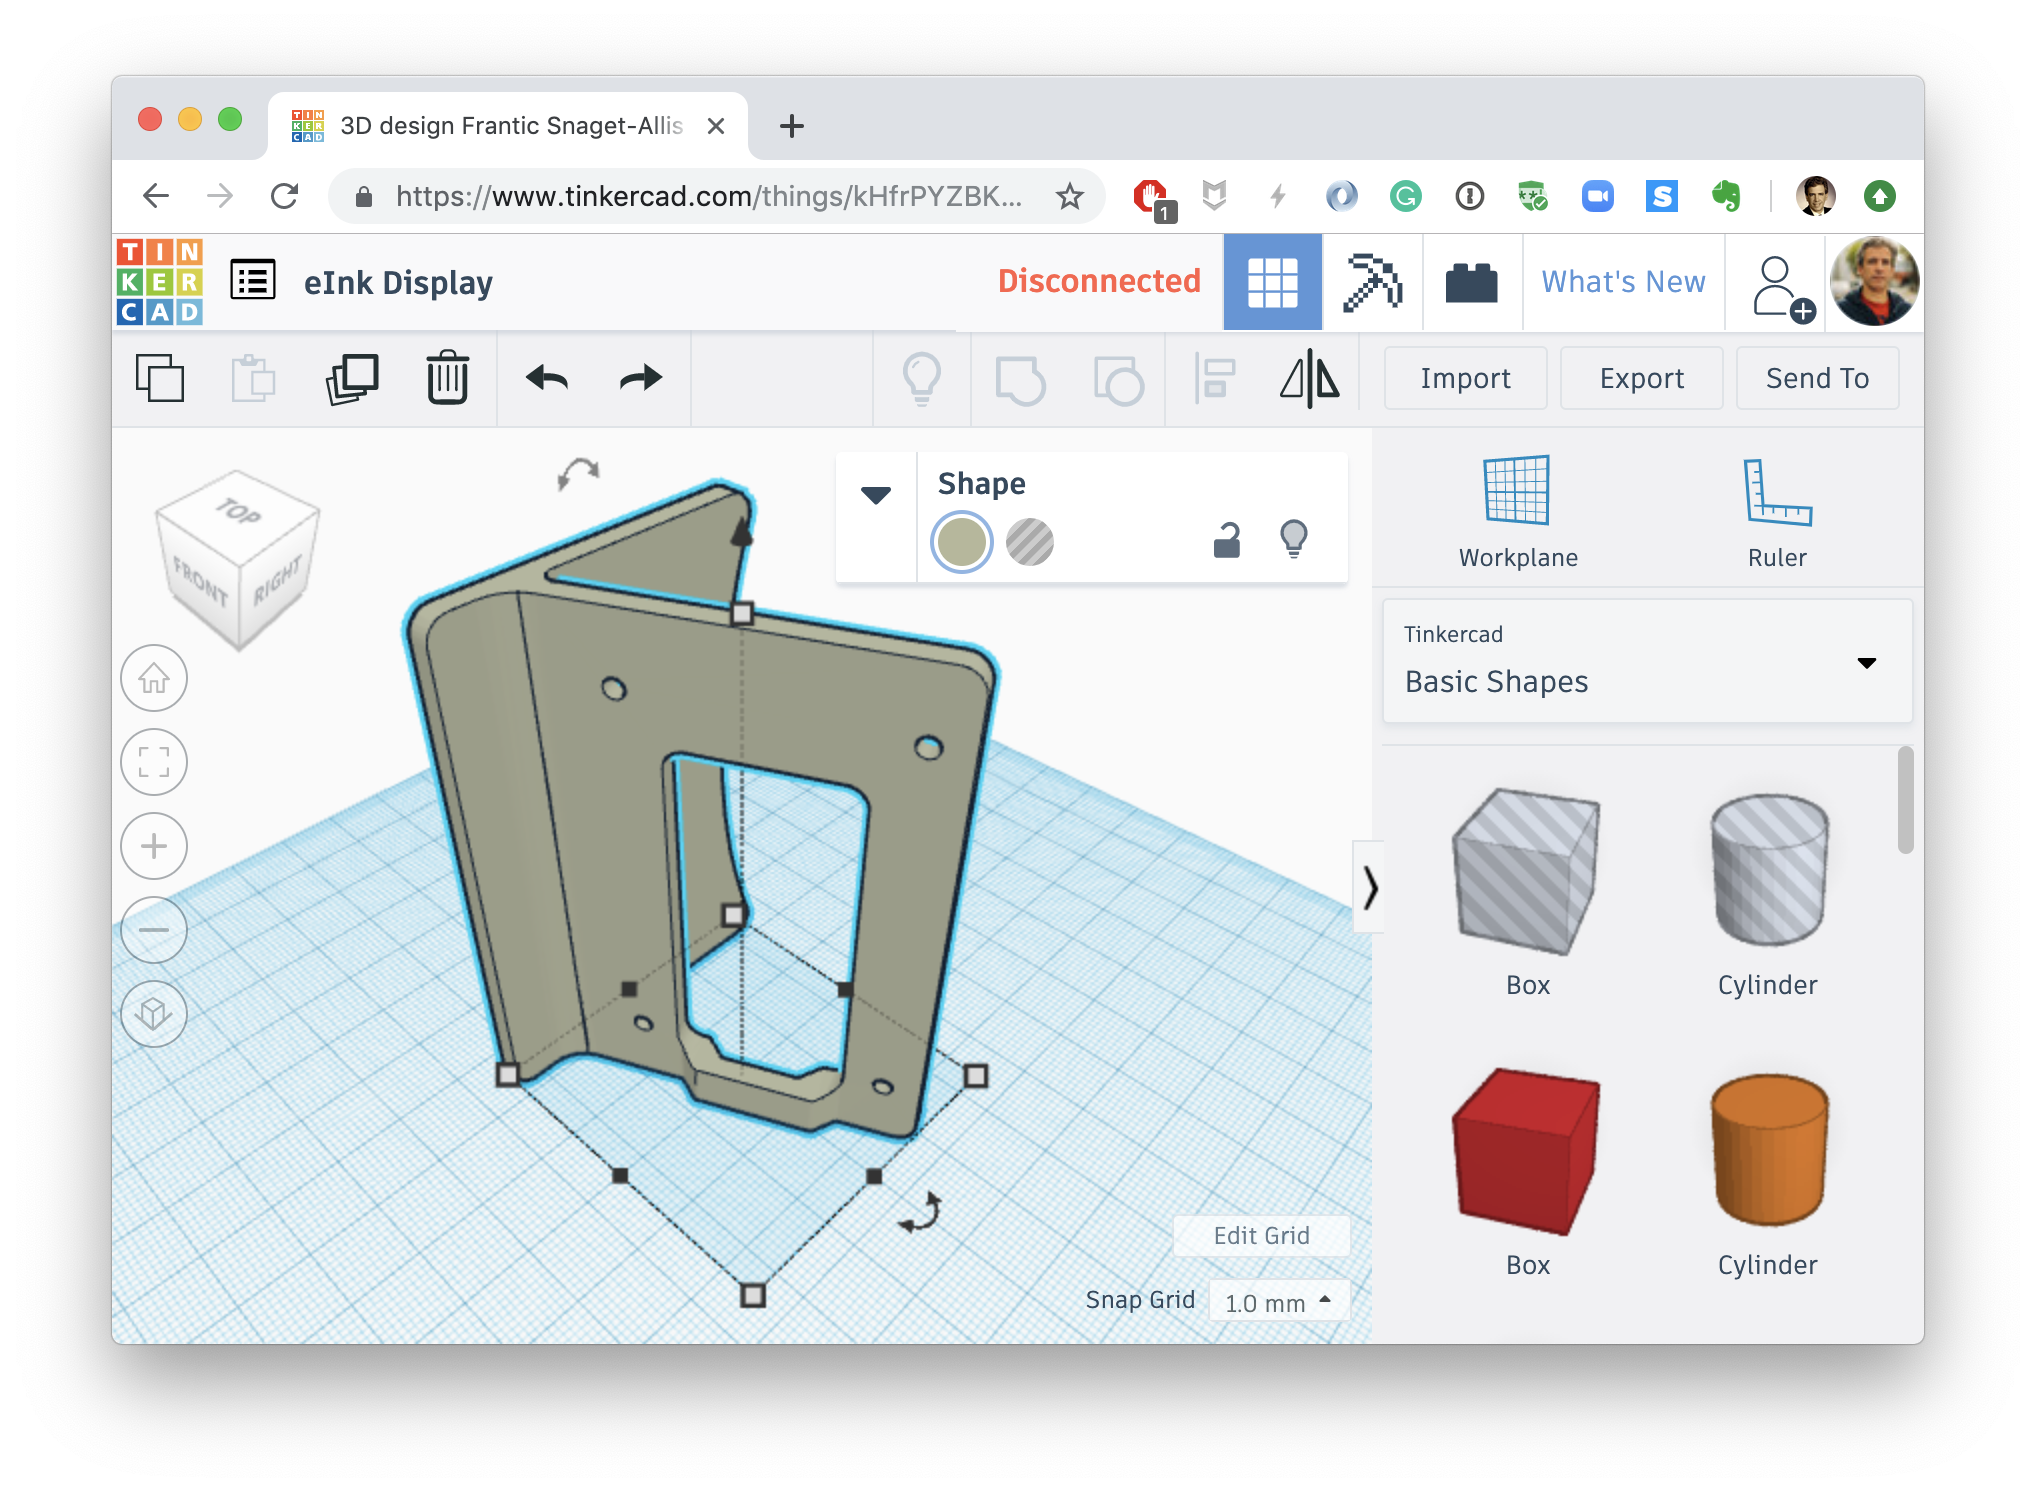
I’ve also found a nice, simple stand for it in Adafruit. Might need to adjust it to support the battery. Imported it into TinkerCad and looks great.